I’ve never had this amount of mails before relating to one specific pattern, so I definitely had to do a tutorial on this one. I hope this will answer most of the questions I’ve received. If you still have questions concerning this or other matters, please don’t hesitate to mail me.
So this is a ‘step by step’ on a ‘Lonesome Tom’ pattern (well, two actually, because I use two different methods to make the head). Click on any image to enlarge.
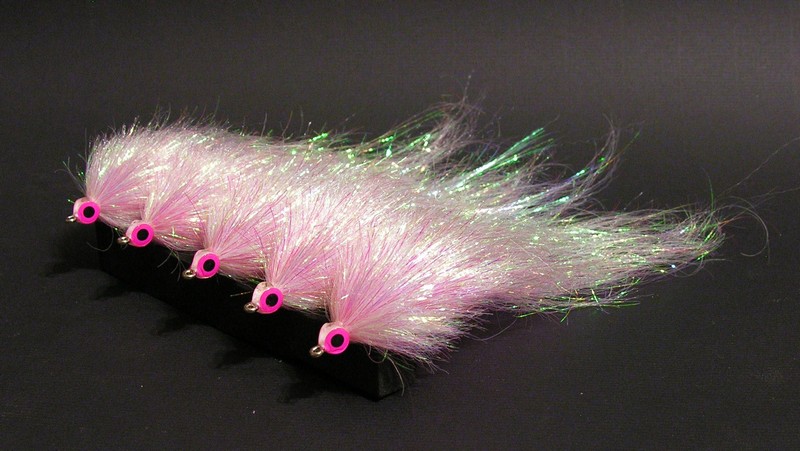
This fly is about 14 cm long, tied on an SS-1930 Inox, size 4/0 (but I know that hooks are very personal, so this is not a must), and you can use any colour combination you want. This is just my version in chartreuse and white.
1. Put your thread on the hook (I always varnish the hook shank before I put on the thread).
2. Tie in some flash material (this is Polar Flash) like this.
3. Fold back the excess and tie it in.
4. Tie in a chartreuse rabbit zonker strip. At this point I put on some lacquer but it’s not really necessary.
 I also put a hairclip on the tail, so it won’t get in the way while tying the rest of the fly.
5. Tie in some white chenille (this is Vampire Plush).
6. Wrap the chenille around the hook shank (about 1 cm), cut it, and tie it off.
Now comes the bucktail. There are two reasons why I use bucktail here.
One, It gives a nice transition between the head and the tail, which gives it a more natural profile.
And two, It keeps the tail from wrapping around the hook (it will still happen, but a lot less).
7. Tie in some white bucktail and spread it evenly around the bottom of the hook shank.
8. Tie in some chartreuse bucktail and spread it evenly around the top of the hook shank.
 9. Cut off the excess and use Head Cement to secure it (this is very important for the durability of your fly).
10. Then wrap your thread around the hook shank to make this kind of conical shape. This will make the building of the head a lot easier.
This is the amount of polypropylene fibre (or EP Fibre) I use to make the head. As you can see, I will do it in 4 (x4) steps. But that’s because I’m used to do this.
 If you’re not used to tie a head like this (or if you don’t have this kind of soft synthetic fibre), I would recommend that you do it in more (than four) steps, with less material. You won’t notice it while tying, but once you cut it into shape, you will have certain gaps (and that doesn’t look very nice).
11. a. Tie in the red fibre on the bottom of the hook shank (two tight wraps is enough).
b. then the white fibre on one side
c. and again on the other side
d. and chartreuse on top
at this point, I use a half hitch knot to secure, and then pull the thread trough the middle of the fibre on the bottom of the hook shank (the red in this case) while pulling all the fibre backwards, and wrap the thread around the hook shank a couple of times in front of the fibre.
I use another hairclip to keep all the fibre out of the way for the next step (it can get really messy if you don’t).
12. Tie in some Barred Crazy Legs (or Flexifloss, or whatever…)
13. Repeat step 11 (in this case, white on the bottom, and chartreuse on the sides and top of the hook shank).
14. Again, repeat step 11.
15. And again. Then tie off, whip Finnish, and lacquer.
This is what you’ll get, and as you can see, this fly is in desperate need of a haircut.
15. So after cutting the head into shape (be careful with the Crazy Legs), and gluing some epoxy eyes on, you should have something that looks like these.
Now, if you feel like this is to difficult, or to much work to put into a single fly (which I can perfectly understand), then this might be an alternative.
The first 10 steps on this fly are the same as the fly above (except this one is completely white, but you can use any colour you like of course). So let’s continue from this stage on…
11. Make a brass wire dubbing brush with the same material as above (in this case, white and red polypropylene fibre, but I’ve mixed in some flash material as well). If you don’t know how to make one of these, I made a tutorial on how to make a brass wire dubbing brush a while ago, which you can find in my blog archive, on Thursday 25 November 2010.
12. Tie in the dubbing brush.
13. Wrap it forward (tight) around the hook shank like this, while pulling all the fibre backwards…
 14. until you reach the hook eye. At that point, cut off the excess. I don’t have any excess here besides the wire itself, because I’m quite used to do this, but I can guarantee you that you will have some excess in the beginning. So make sure to make your dubbing brush long enough. It’s a lot easier to cut off a bit because it’s to long, than to add a second one because it was to short!
Then tie off, whip finish and lacquer.
15. This next step is important. This is very soft material, so by making the dubbing brush and tying it in, lots of the fibre will be attached to the hook shank at both ends of the fibre.
 All you have to do is put your scissors into the fibre, along the hook shank like you see on the picture. DO NOT CUT! But just pull your scissors upwards, and continue to do so around the hook shank. You will feel it when it’s no longer necessary, once you put the scissors in and you’re able to pull it upwards without any resistance.
Then you will have something that looks like this. Which again, is a fly in desperate need of a haircut.
16. So after cutting the head into shape and adding some epoxy eyes, you should have a fly that looks like this.
Like I’ve said before, my video footage an the action in the water of this fly was a bit disappointing, so you’ll have to take my word for it, or even better, tie some yourself, and…
tight lines!