Showing posts with label practical. Show all posts

Saturday, 31 March 2012

Making popper/slider heads


The flies on my last post were made with these ready made poppers from Wapsi
(but loads of other brands have something similar).

 
It is a simple way to work, they have a nice shape, they are very durable (I don’t know what they’re made off, but they’re very hard, so a layer of epoxy is not necessary), and if you want, they come with hooks to match.

So, you warm your hook with a lighter (that’s how I do it), push the popper in place, fill the groove with epoxy or some UV stuff,


make a hole for your rubber legs (more on that matter later), paint the popper, and you’re ready to tie the rest.


But like all ready made products, they have their limitations (size, buoyancy), not to mention the fact that most fly-tiers like to make everything themselves (including me). So here we go…


I start with this piece of foam.
I bought this one in a fly shop (but loads of industrial foams work equally good) and cut out a square section, which I cut very roughly into shape.


And now comes an interesting trick I learned from the Grey Piker
(thanks again Philippe!).


I glue the foam onto a piece for my dremmel tool (this is a whetstone I only use for this purpose).
You can see that I’ve cut the foam only very roughly, which is no problem at all.


Just hold the foam against a piece of sandpaper and start your dremmel tool. I use two kinds of sandpaper, a ‘100’ for the rough shape and a ‘240’ to finish.


And the result is a nicely shaped popper (or slider) head.


Then I cut a groove with a scalpel.


If it’s a popper I want, I scour a cup with another dremmel tool. 


Next, I put some varnish or super glue on a hook, and put some rough thread on (this is sewing cotton).


Then I glue on the popper head (I reversed it here, because I wanted a slider instead, but it’s the same principle).


When dry, I fill the groove with epoxy or some UV stuff, and I’m ready to paint.

 
Now, you can actually paint the heads, or use markers, but the most interesting way I think is with a paintbrush set… 
but I don’t have that. So I use this aerosol.


One tip maybe: do it outside, you can’t believe what kind of a mess this stuff can make (not to mention the smell).


But, you have a nice,
quick result.


Since this foam is rather fragile (certainly when you take pike teeth into account),
it’s necessary to coat it with a layer of epoxy.
And at this point I like to add some glitter as well.


For the slider (red/white) I added some red and silver glitter to the epoxy. This works well when you want the same colour and amount of glitter equally around the head.


But with the popper (chartreuse/green), I wanted some green glitter on top of the head and gold on the bottom. So I just put some varnish on the place I want the glitter and scatter some on it. Once the varnish is dry, I put on an epoxy coating.


I also put on the eyes while the epoxy is still wet.


And once the epoxy is dry, I make the hole for my rubber legs.


There are several ways to make that hole, but heating up a bodkin or a needle and push it trough is the easiest and most popular.


Although I like to use this tool as well. This is boilie drill (for carp fishermen), which is basically a drill on a handle.


For once, I will not advise you to use a dremmel tool. With the speed of the rotation, the foam will melt, which leads to two possibilities. One, your drill gets stuck in this melted substance (then you can either break your popper head, or break your drill, and since I can be stubborn... I did both). Or two, you're able to push it trough but your drill ends up with a plastic coating (which is a real mess to clean).

And then of course I tie the rest of the fly…


The popper is about 13 cm and the slider about 18 cm long. They are both tied on
a Piketrek Eagle Claw Pike Fly hook, size 5/0.

If you have any questions or suggestions concerning this post (or others),
please don’t hesitate to send me a mail…

Sunday, 15 January 2012

Tubefly experiments

Tubeflies are something that you rarely see over here in Belgium, but it’s a kind of tying (and fishing) that I wanted to try for a while now, and finally, I got my hands on a “Eumer tube fly starter kit”.


It says in the catalogue: “This starter kit is the perfect kit for new tubefly enthusiasts. With a mix of brass and plastic tubing, regular and monster coneheads, artic fox, Finn raccoon, nutria, and a tube fly adapter, it has everything needed to tie over 100 flies”. It also includes a Product Catalogue with some tying instructions. So what could possibly go wrong?


Well... this…


This is how you’re supposed to put your adapter into your vise. And it looks good doesn’t it…


But however hard you put pressure on the jaws of your vise (and believe me, this Dyna King can handle a lot), the least amount of traction on your tying thread makes the adapter slide like this.


I can guarantee you that this makes your enthusiasm turn into frustration immediately.

But I don’t give up that easily, so I came up with a solution.


I took another vise. This is a Danvise, which is partially made of plastic, and I just drilled a hole in it…


And put the end of the needle into the hole. This way I can use a lot of pressure and the adapter doesn’t move at all!


So I was finally ready to start.


Of course I did some research on the internet first, because this is entirely new to me. And a very easy way to start, is to go to the site of Eumer themselves (http://www.eumertube.com/ ). It has loads of tutorial videos to get you on the way.
So I tied me of couple of those first, just to get some feeling with this kind of tying. But of course I wanted to switch to pike flies as quickly as possible, and here are the first…


I think that the hardest part of my difficult last months is over now, so from now on
I will post more regularly again (I hope).
First, I will tie me some of the same pattern as the flies above, on a hook, so I can compare them both tomorrow (if my back is a little more cooperative than today)…

Sunday, 30 October 2011

Practical


If you aren’t doing it already, this might be useful.

 
This is probably a familiar sight. You want to use a certain colour of bucktail, but there’s hardly anything left. This is light olive and that’s the colour I needed, but I didn’t find any.


So when I arrived at my favourite fly-shop (Fario Jan), he suggested to buy a regular olive and bleach it. I don’t know why I didn’t think of that before, because it’s really easy.

 
I took a plastic bowl, with 1/3 water and 2/3 bleach, put the bucktail in for about 15 min, put it under the tap, and I had the exact colour that I wanted.

I already have some other colours in mind to treat the same way… 


Monday, 26 September 2011

Production mode

Usually when I tie a pike fly, I leave my hook in the vice from start to finish, but this weekend I got a rather large order of ‘Lonesome Tom’ patterns, so I started looking for a method to speed things up a bit.

I started with tying the tails and the bodies first, so I could do the heads later.


But when I looked at the amount of brass wire dubbing brushes I had to twist manually, my courage abandoned me very quickly.


So I came up with a new setup to make my brass wire dubbing brushes.
Equally easy, equally efficient, but a lot faster.


I just screwed an eye (like you see on the left) straight into my tying table (yes, I did), used the same piece of wood (with a groove), but attached the second eye into my dremmel tool. I use this dremmel tool for all kinds of stuff, so I really don’t know why I didn’t come up with this idea before. But, better late than never, so now I’m off to finish my flies. That will be for a next post…


Tuesday, 22 March 2011

Tying thread

I didn’t post much lately, because there isn’t much to post in the first place. The few waters that I’m aloud to fish for pike over here at the moment, had very disappointing results so far, so I’m planning a fishing trip to the Belgian Ardennes to fish for trout. So most of the time I spend on tying these days, goes to nymphs, wet flies and trout streamers, which I won’t post here (there are plenty of sites and blogs of people who tie them a lot better than I do).

But today, I had a question on my last post from Bruce Deschamps
“Which thread do you use the most to tie pike flies and do you use different size of thread to tie specific fly patterns?”
Since the answer was a bit long, I decided to make a post of it.

 
When I tie small flies (dry flies, nymphs,…), I use normal tying thread. Like UNI-Thread, or Grall from Hends Products.


But for pike flies, I use something else.

 
When I need a thread to use a lot of force (for stacked deer hair heads, for example), my favourite is G.S.P.

But, G.S.P. is hard to get the last couple of months (over here in Belgium anyway), or you have to pay a ridiculous price for it.


So I switched to Dyneema instead, which works equally good. The only thing you have to look out for, is that you buy bobbins that hold about 50 yards max (the last time, I bought me a bobbin of a 100 yards, and it became quite a mess).


The only reason to use this kind of thread, is to use a lot of force. And by doing so, it cuts its way into the thread stacked on the bobbin, which has very annoying side effects (since this is a kind of floss, and not really a thread, parts of it get stuck, break off, hang loose afterwards… I think you get the picture).

 
I even started using braided Spectra Fibre, a Power Pro Line (15/00) that I had still laying around here from the time I used to fish with lures (which I don’t do anymore), so why not use it to tie flies.


I also use nylon mono, mainly for 'high ties' (to let the colours of the fibre come trough the thread).


And of course all kinds of sparkly or other crazy stuff to pimp your fly, but I won’t go into detail on that kind of personal favourites.


But for most of my pike flies, my absolute favourite is strong cotton (for sewing), which is available in every colour imaginable.


This kind of thread is strong enough to tie everything in very tight, and cotton is rather rough, which makes tying a lot easier (normal tying thread is usually synthetic, which makes it very slick).

 
The only problem with good quality strong cotton, is that it’s usually on a bobbin like this, which doesn’t fit at all on your bobbin holder.


To overcome this problem, I use a dremmel tool, to wind the thread on a smaller bobbin (fast and efficient).


Which brings me to something else that I’ve never mentioned before.
I always fish with barbless hooks! I don’t want to start a discussion about this matter. For my part, you can fish every way you want to, as long as you don’t harm the fish more than is necessary (that’s something that really pisses me off!). My experience with this way of fishing is that, if you drill your fish rigid enough, you won’t loose more fish. And even if this is the case, it’s a fact that you can unhook every fish you do catch a lot easier and faster. In the worst case scenario (when the fish breaks the line, and swims off with your fly), the fly will come loose very easily, which gives the fish a better chance of surviving the encounter it had with you. But I’m drifting off here (I can get very excited about this, because I’ve seen a lot of cruelties along the water side).

 
What I was trying to say, is that a dremmel tool is perfect to get rid of any barb on your hook. And it has a lot of other applications as well, like drilling, carving, polishing,…


or hollowing out a cork to make a popper head. It’s just a fantastic tool to have near your tying table.

All this makes me think about other simple practical stuff, but that will be for later… 

Friday, 18 February 2011

Why titanium?

Actually, I wanted to post a picture of a pike with a ‘rattle redhead’ in its mouth in reply to David (Romanillos) his last comment, but that didn’t work out the way I wanted. I went fishing this afternoon and I did hook a pike with it, and as he was ready to be landed… you know, sliding trough the water on his side, with the fly hanging out of his mouth, I though, yes! This will be a great picture! But of course, while I was reaching for my camera, the pike most have known my intension and decided to stay anonymous. He came half out of the water, and shook his head one last time… and disappeared into the deep again.
But I don’t care, I had a great time outdoors, I hooked a pike on a new fly, and was able to take a good look at it. For me, that’s a good day!

However, maybe I can still make this post a little more interesting.

 
This is a situation which most of you will recognize. If you don’t, that can mean only two things. One, there are no barb wire fences where you live. Or two, you never fish.

Now, when you disentangle this mess, every wire trace will look like a cork screw.
I’ve tried all kinds of wire traces (steel, Teflon,…), and they all kink (yes all of them).


Until I started using titanium, and certainly braided titanium.

This is how the trace looked like after disentangling it… as good as new!


I know this stuff is more expensive than other wire traces, but its durability is far more superior. In fact, I only change it when I start to doubt my swivels. And even then, I often just cut of the swivel and replace it with an other one on the same piece of titanium trace (until it gets to short of course). So by my calculations, in the long term, this stuff comes cheaper then any other wire trace!


This is the brand I use, but I’m sure there are a lot of other brands out there that are equally good.


I also filmed the action of a couple of flies, so some video tutorials are coming up soon…


Tuesday, 15 February 2011

The Djuza Project, part 2

I’ve been experimenting with racoon, until I got to this pattern, which I think has great potential (I’ve tested them already, and they look very good in the water).


This is white racoon with pink chenille


It’s a bit hard to explain how I made them, so I did a ‘step by step’ to make it easier.
Click on any image to enlarge.


Put your thread on the hook


Tie in some flash material (this is polar flash)


Then some racoon


Then tie in some chenille (this Vampire Plush)


Wrap the chenille two times around the hook shank (although this depends on the chenille you use, with Krystal Chenille for example, I’ve used three wraps), and tie it in


Tie in some racoon, and spread it equally around the top of the hook shank


Repeat the last two steps up to the hook eye
(a couple of mm in front of it)


Tie in some racoon around the bottom of the hook shank


Glue on some eyes (or like I did, some sequins, since epoxy is the next step, so these will look like epoxy eyes)


This might be interesting
(if you aren’t using them already).


These are hair clips, which are very practical while tying or drying (pike) flies (after using epoxy). They come in all shapes and sizes.
I got this from Ken Capsey from www.pikeadventures.blogspot.com
and they are damn handy!


Epoxy the head

Normally I comb out a lot of fur, but with this racoon, I didn’t, because unlike other fur, the stuff you leave in, doesn’t just absorb water and lay flat, but it actually keeps it’s volume…


as you can see on this picture.


This is the same fly when wet.


And some other colours.
These are all about 9 cm long, tied on a Gamakatsu F 314, size 1.


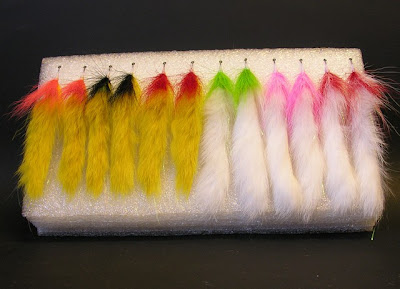
Yellow racoon and red chenille


White and chartreuse racoon with red chenille


These are two flies from the experimental stage of the pattern above (they are tied on a hook that’s to big for this pattern, although that’s personal of course).
They are easier to tie, and certainly very functional as well.


I’ve just tied in the racoon on top of the hook shank.


Actually, I like using racoon. It’s durable, it keeps it’s volume, and has a great movement in the water. But this stuff is not very common here in Belgium, which makes it hard to find, and even if you do find it, they ask an absurd price for it. So, ordering it on the internet is the perfect alternative, but the problem with ordering stuff from internet shops, especially natural material, is that the example they put on their site, looks a hundred times better then the stuff you receive at home!


So if anyone can give me a good tip for ordering reasonably priced, good quality racoon zonker strips, please let me know…