Showing posts with label pike flies. Show all posts

Sunday, 7 April 2013

Flash Flies


If everything goes according to plan, then at this time next week we should already be at our destination in Ireland for an entire week of pike fishing!
In the mean time I’m still tying. And since flash flies worked very well in Ireland last year, I wanted to be prepared for this year.
Here are some of the colours I tied so far…

Silver Pearl


Green Pearl


Pink Pearl


Yellow Pearl


And the exact name for the next material is
“Twisted Flash Peacock Pearl”


 I have big expectation on this last colour.

I’ll tell you if I was correct when we get back…

Tuesday, 2 April 2013

Pike Flies


Some of you probably thought I went up into thin air, never to hear from me again, but guess what? I’ m still here! Now I could start to explain what happened the last couple of months but, most likely, you wouldn’t believe me anyway. And besides,
this isn’t Facebook! So I’ll stick to the things that matter (for all you pike fly fishermen anyway). I’ve had NO fishing and tying for several months (sad but true), but…
I’M BACK NOW!!!
And I have an upcoming trip to Ireland in less than two weeks, so that’s reason enough to pick up my blog again!

Besides, my vise started to send out some weird ultrasonic waves,

so unable to resist, here’s some new stuff…


This next fly is somewhat different than the previous one. First, this one still has a collar of marabou which I don’t use anymore. Some will say that it flares out while retrieving, well that’s bullshit (pardon my language), because it will only flare out when you have another material underneath that makes that happen (like bucktail for example), otherwise it will remain flat and sticky, which in this case isn’t a problem because it gives it a bloody effect. If you want something to flair out, use raccoon like I did with the first four flies.
But that’s not the reason why I posted it. The weak point with the previous flies are the eyes, sooner or later they get bitten off. I know, some types of glue are better than others, and I’m pretty satisfied with the “Loctite Flex Gel” I’m using, but it will still happen. If they don’t bite off the eyes, it will be the part of the head wherever the glue went.
So with this next fly, I put on some epoxy on the tip of the head and smeared it over the eyes. This way they will never come off. I already tested this one and it has little or no effect on the action of the fly, so I’ll certainly adjust a couple more.


This next one is a combination of two flies. I used the basics of a “ Firetiger Hangtime” by Brad Bohen for the tail and than made a collar of raccoon and my usual head of Slinky Fiber (in a brass wire dubbing brush).


And a couple of tandems as well…


I’m not quite satisfied with the colour of the head on the last one, but I‘m sure the pike won’t mind.

And now I’ll get to work again, I still got a lot of things to do the next couple of days…


Friday, 26 October 2012

Pike Poppers


If I lived in pike paradise… I mean in a country like Ireland, Finland, Canada,… then I would certainly fish a lot more with poppers. They’re not the best way to catch a pike, but they certainly are the most spectacular way! Unfortunately I live in Belgium, where focusing on catching a pike (in whatever way), is already a big task. So I mainly focus on the best way  to hook them on a fly.
But they’re so much fun on your vise, that sometimes when I’m in the mood, I just can’t resist making them. I say ‘making’ instead of ‘tying’, because to my knowledge (please correct me if I’m wrong), there is no pre-maid popper-head on the market that will support a 5/0 or 6/0 hook, along with a steel- (or titanium-) leader tip (and swivels), plus some rubber legs and a 15 to 20 cm tail tied on to it, that will still float enough to call it a popper. So ‘making’ the head will take most of your time.
But, this week I was in the mood to make some,…

They’re 15 to 17 cm long, tied (made) on a Piketrek, Eagle Claw, Pike Fly Hook (that’s a mouth full), size 5/0. I took two pictures from each so you would have a better idea on how I made them.


I also made some sliders. Fish these on an intermediate line, let them hit the surface, then start stripping again, and you’ll have a deadly fly.


What I would also like to share, is the material I used to make the heads. On a previous post you’ve seen how I make my popper heads (if you didn’t, click on the label ‘poppers’ on the bottom of this post or on the right column of this blog). This time I used another kind of  (cheaper) foam. I got another great tip from Renzo Callebert, a great fly-tier, and always in search of unconventional tying material.

Some of you will remember those wooden blocks in different colours we used to play with as a child. Well nowadays (due to all kinds of safety regulations for child’s play), they make this stuff in foam! And an interesting (and really cheap) foam it is.

Do you have any idea how many popper heads you can make with this? Well,… neither do I, but it will certainly be a challenge to find out.


The next pike flies I will post also started with an idea from Renzo,… although some other stuff will come first I think (pike on stamps for example, because my collection has grown)… 


Tuesday, 3 April 2012

Filling boxes


Only four nights sleep and we’re off to Ireland, well actually it’s three and a half, because we’re leaving very early Saturday morning. So it’s time to fill my boxes with the flies I think may be useful. I will certainly have more than enough pike flies, but some patterns can use some additions, so I’m still tying.
(Click on any image to enlarge)

Some flash flies for example.

They’re all about 16-17 cm long, tied on a Gamakatsu LS-5213N (a very good hook by the way), size 6/0.

The flash I used is Polar Flash. This is very nice stuff to work with. Every ‘colour’ is actually a blend of different colours of flash. It’s thin, soft and it moves fantastically in the water, without being ‘too flashy’.

And they’re very easy to make. Just tie in a tail, then a brass wire dubbing brush with the same material, glue on some eyes, fill the gap between the eyes with some UV stuff and you have a very durable, great moving fly.


Last week I came across this stuff in one of my closets (black/purple Christmas tinsel).
I bought it more than a year ago, and then I just forgot about it.


But it’s an interesting colour, so I tied me a couple with this stuff as well, both on a single hook and a tandem version.


Some small (8-9 cm) EP baitfish patterns. Nothing special, except maybe the hook choice. These are ‘high ties’, so I wanted a very short hook shank, but not a circle hook (I don’t want to start a discussion, but I really don’t like fishing with those), so I used these carp hooks.


Normally I use these carp hooks as a trailer hook for flies like this.


This fly has been hanging on my board for several weeks, it only needed some UV stuff between the eyes to finish it.


The same with these two tandem flies, they have been hanging there for several months. All they needed was some epoxy on the head and over the sequins I used for the eyes.

And I’m sure I’ll find some other stuff as well with minimal work to complete, so…


Saturday, 31 March 2012

Making popper/slider heads


The flies on my last post were made with these ready made poppers from Wapsi
(but loads of other brands have something similar).

 
It is a simple way to work, they have a nice shape, they are very durable (I don’t know what they’re made off, but they’re very hard, so a layer of epoxy is not necessary), and if you want, they come with hooks to match.

So, you warm your hook with a lighter (that’s how I do it), push the popper in place, fill the groove with epoxy or some UV stuff,


make a hole for your rubber legs (more on that matter later), paint the popper, and you’re ready to tie the rest.


But like all ready made products, they have their limitations (size, buoyancy), not to mention the fact that most fly-tiers like to make everything themselves (including me). So here we go…


I start with this piece of foam.
I bought this one in a fly shop (but loads of industrial foams work equally good) and cut out a square section, which I cut very roughly into shape.


And now comes an interesting trick I learned from the Grey Piker
(thanks again Philippe!).


I glue the foam onto a piece for my dremmel tool (this is a whetstone I only use for this purpose).
You can see that I’ve cut the foam only very roughly, which is no problem at all.


Just hold the foam against a piece of sandpaper and start your dremmel tool. I use two kinds of sandpaper, a ‘100’ for the rough shape and a ‘240’ to finish.


And the result is a nicely shaped popper (or slider) head.


Then I cut a groove with a scalpel.


If it’s a popper I want, I scour a cup with another dremmel tool. 


Next, I put some varnish or super glue on a hook, and put some rough thread on (this is sewing cotton).


Then I glue on the popper head (I reversed it here, because I wanted a slider instead, but it’s the same principle).


When dry, I fill the groove with epoxy or some UV stuff, and I’m ready to paint.

 
Now, you can actually paint the heads, or use markers, but the most interesting way I think is with a paintbrush set… 
but I don’t have that. So I use this aerosol.


One tip maybe: do it outside, you can’t believe what kind of a mess this stuff can make (not to mention the smell).


But, you have a nice,
quick result.


Since this foam is rather fragile (certainly when you take pike teeth into account),
it’s necessary to coat it with a layer of epoxy.
And at this point I like to add some glitter as well.


For the slider (red/white) I added some red and silver glitter to the epoxy. This works well when you want the same colour and amount of glitter equally around the head.


But with the popper (chartreuse/green), I wanted some green glitter on top of the head and gold on the bottom. So I just put some varnish on the place I want the glitter and scatter some on it. Once the varnish is dry, I put on an epoxy coating.


I also put on the eyes while the epoxy is still wet.


And once the epoxy is dry, I make the hole for my rubber legs.


There are several ways to make that hole, but heating up a bodkin or a needle and push it trough is the easiest and most popular.


Although I like to use this tool as well. This is boilie drill (for carp fishermen), which is basically a drill on a handle.


For once, I will not advise you to use a dremmel tool. With the speed of the rotation, the foam will melt, which leads to two possibilities. One, your drill gets stuck in this melted substance (then you can either break your popper head, or break your drill, and since I can be stubborn... I did both). Or two, you're able to push it trough but your drill ends up with a plastic coating (which is a real mess to clean).

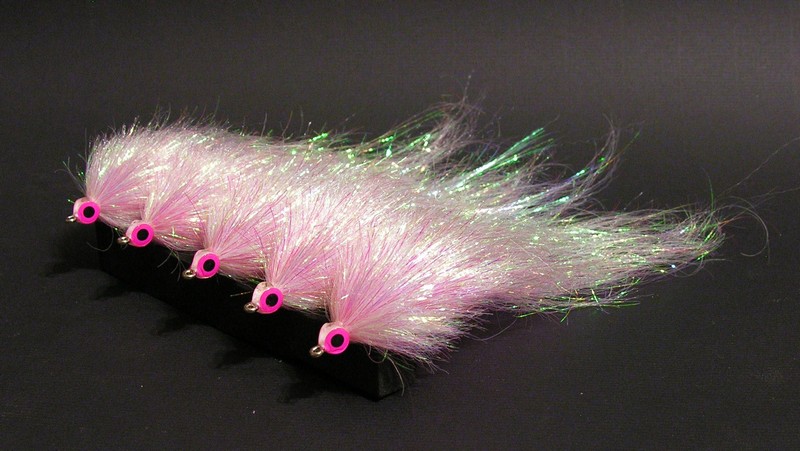
And then of course I tie the rest of the fly…


The popper is about 13 cm and the slider about 18 cm long. They are both tied on
a Piketrek Eagle Claw Pike Fly hook, size 5/0.

If you have any questions or suggestions concerning this post (or others),
please don’t hesitate to send me a mail…